Showing posts with label pork. Show all posts

Thursday, 29 April 2010

Bathed in Warm Olive Oil. Not Me, The Pig.

We've eaten a LOT of pork lately. It's totally my favourite meat, especially since moving back to the UK, where the free-range stuff is so darn tasty and affordable. Since our porky outing to the farmers market last weekend, I've also picked up some nice cuts at Waitrose and have done a little experimenting.
I have wanted to try confiting pork belly in olive oil for a while now and finally decided to give it a go the other day after stumbling across a similar recipe on Great British Menu last week.

This is definitely a weekend endeavour because you need to start pretty early in the day, but it's worth the time it takes. There's not really much effort or expertise required, just a little patience and quite a lot of olive oil, which can be re-used if you filter it out afterward.

I wasn't sure whether to post this, because it wasn't a 100% success. The crackling wasn't ready in time to serve with dinner and the meat was a little on the salty side.
But I committed to posting the good and the bad, the successes, the failures and the in-betweens, so here we are. The first few bites of pork were groan-oh-my-GOOOOD tasty, but by about halfway through, the level of seasoning starts to feel a little much.
I'm going to do this again, no doubt, but I think next time, I'll leave the salt on for maybe seven hours instead of 12 and I'll shave most of the fat off the skin before I roast it.
I wont bother with the recipe per se, but I will show you what I did and how it all worked out. If my next endeavour works as well as I think it might, I'll post detailed instructions, as this has the makings of a show stopper (If I could be bothered to plate better and get a camera instead of using my iPhone....)
So here it went:

I bashed up 100g of Maldon sea salt with 5 halved cloves of garlic, a large sprig of rosemary, some thyme and black pepper corns.
I sprinkled approximately 1/2 of this mixture into the bottom of a baking dish, then sliced the skin off a 1kg (2 lb)pork belly and pressed the meat down onto the salt mixture.
I sprinkled the rest of the salt mixture over the pork and rubbed and pressed it well into all the nooks and crannies, covered it and put it in the fridge over night (12 hours)

I then rinsed the meat well (perhaps not well enough? maybe I should have used warmer water to get rid of more of the salt?) and I patted the meat dry before putting it back in the (cleaned) baking dish and pouring a little over a litre (2 pints) of olive oil, enough to completely sumberge the meat.If you have a lot of room around the meat in the pan, a clean, empty jam jar will take up some room so you don't need to use as much oil.
I roasted this for 4 1/2 hours at 90C (194F) until tender but not flaking-falling apart.

Then I drained off all of the oil* and put the meat between two layers of parchment paper in the baking sheet, with another baking sheet on top, weighted down with a granite pestle and mortar and some canned tomatoes for two hours.
One hour before I wanted to eat, I took the meat out of the fridge so that it could come up to room temperature and I cut the meat into 4 serving- size pieces.

(The meat did not shrink much- the picture to the right was taken in a larger baking dish, so it looks a lot smaller.)

I put the skin (scored on both sides) between two pieces of parchment and baking trays, rubbed it with salt and weighted it down with the same mortar, pestle and canned tomatoes (20 minutes later, the oven door was blown open and the interior of my oven and everything in it was splatted with crushed tomatoes :-) and I roasted the skin at 200C (400F) for what was supposed to be 40 minutes, but ended up being closer to 90, in order to get a perfectly crisp crackling. I know this method is successful because I've seen it done and even chatted with the tutor at my cookery class. I have done some research since and think that I needed to trim off most of the subcutaneous fat before roasting. I'll let you know how that turns out.

Right before serving, I brought some of the confit oil up over a fairly high heat in an iron skillet and I seared the pork on each side for about 2 minutes, creating a golden crust and warming the meat through completely.

To serve, I made some carrots cooked in reduced chicken stock and honey, scattered with fresh mint and roasted some new potatoes with their skins on.

* To filter the oil, let it settle for a while in a tall jug or pitcher, so that the liquid that has come out of the pork collects at the bottom. Pour the oil through a funnel lined with dampened paper towel into a bottle (label it so you don't mix it up with other oils) and be careful not to pour in any of the liquid at the bottom. When you get to the last inch or so of oil, it might be easier to use a spoon. The pork liquid will coagulate into a jelly at room temperature, so that makes it easier to keep it separate. Keep the porky jelly to flavour soups, and sauces but be careful not to use too much, as it is salty.
You can now use the filtered olive oil in any other cooked dish and it will be fine for several weeks if you keep it in the fridge. It will have a garlicky, herby flavour, so keep that in mind when adding it to dishes.

If you have any crackling advice for me, or have tried this method for cooking pork and have had similar or more successful results, I'd love to hear about it.

Have a brilliant weekend!

PS. I had another sourdough success!! This time following HFW's River Cottage method. Absolutely fantastic bread, we couldn't stop eating it!

Sunday, 25 April 2010

Posh Pork and Beans

My life has been one long catalogue of obsessions. Before you start imagining me hiding in some completely unaware guy's garden bushes, watching him play guitar on his bed, while I cry and cut myself, the kind of obsessions I'm talking about are far more harmless (usually).

It was gymnastics and my pet rabbits when I was little, painting and depressing music in my teens, jewelry making and fashion in my twenties and so far in my thirties, it's been growing veg and sewing. Along the way, cooking has been the one constant thing that I never got bored with but even so, there have been several ingredients, techniques and ethnicities that I become enamoured with for a period of time until I move on to the next. I spent much of my teens trying to perfect a simple Bolognese sauce, used chipotle in far too many things in my twenties, and so far in my thirties, have gone nuts with stock making, bread baking, cakes, pies and pastries, as well as slow roasts, Mexican and custard dishes.At the moment, my fascination is with sous vide, and I know I'm not alone. All over the food blogiverse, there are tales of home attempts, successes and failures and of course, it's something I have just had to try for myself. Last week I tried doing some chicken breasts this way and was really happy with the results, even though I was overly cautious with the temperature and length of cooking. At Waitrose this week, they had pork fillet (tenderloin) on sale, and so I thought I'd try again, but this time at a much lower temperature and for a shorter time. The result was a beautifully tender and juicy piece of pork which required barely any effort to cut. It took only a little more time to cook than conventional cooking and so is how I will definitely cook this cut from now on.

I've served the pork with haricot beans which I dressed in a ginger, tomato and chilli vinaigrette I learned to make at Le Manoir aux Quat Saisons during my class on Monday. The dish we made was with squid and chick peas (garbanzo beans) and I loved this dressing so much I had to use it here.
Sous Vide Pork Tenderloin with Haricot Beans
Serves 2, takes 7 hours, including brining. 1 hour actual work.

1 decent-size free-range pork tenderloin, about 600g (1+lbs)

For the brine:
200ml (7 oz) boiling water
800ml (27 oz) cold water
4 tbsp sea salt
1 tbsp caster sugar
1 sprig sage, leaves picked
1 sprig thyme
1 small sprig rosemary, leaves picked
3 cloves garlic, peels on, halved
10 peppercorns
the zest of one lemon, sliced
a large handful of ice cubes
2 bay leaves

For the beans:
150g dried organic haricot beans, soaked overnight and simmered for 2 hours in plain water
3cm piece fresh ginger rot, peeled and coarsely chopped
3 ripe Roma tomatoes (or other nice, ripe tomatoes) chopped
1 large red chilli, de-seeded and sliced
2 tbsp white wine vinegar
2 tbsp water
100ml extra virgin olive oil
salt and pepper
juice of 1/2 a lemon*

To serve:
Washed baby spinach and rocket (arugula) leaves
French breakfast radishes, halved

Make the brine first, by crushing the salt, sugar , garlic, lemon zest, herbs and peppercorns together in a pestle and mortar until the herbs are well bruised and the salt is going green.
Put the salt and herb mixture into a small bowl, boil about 200ml (7 oz) of the water and pour it over the salt mixture, stirring until the salt and sugar have dissolved. Pour the cold water in and add the ice cubes. Put the pork into the bowl and make sure that it is completely submerged in the brine. Refrigerate for 6 hours or overnight.

Remove the pork from the brine and pat dry. Lay two overlapping pieces of cling film onthe counter top and lay the pork, just below the halfway point, parallel with the counter then wrap the film over the pork, away from you. Roll the pork away from you, wrapping as tightly as possible in the cling film,twisting a little if necessary to ensure that there are no gaps or air pockets. Using a ruler to help tuck while you roll might be useful.
You should have a few inches of cling film hanging over the ends of the pork. Pinch and twist the loose ends and tie into a tight knot as close to the meat as you can.

Fill your largest pot (I use my big stock pot) with hot tap water, which should be fairly close to 60C (140F), which is the temperature at which you want to cook the pork. Pop the pan onto (or half-way onto) your smallest burner, on the lowest setting (A heat diffuser might be useful here) to achieve or maintain the ideal temperature. Use a probe thermometer to check the temperature and drop the pork in, it should drop to the bottom of the pan. After you drop the pork in, the temperature of the water will begin to drop slightly, so you'll need to give it a little more heat to bring it back up. Cook the pork for 35-40 minutes, checking the temperature regularly to maintain the ideal temperature, moving the pan slightly off the heat if the temp starts to climb above 60c (140F)

When you check the internal temperature of the pork by inserting the thermometer into the thickest part of the meat, it should read 60C (140F). If not quite up to temp, put the meat into a zip-top bag, squeeze as much air out as you can and give it a few more minutes. When the meat is done, remove it from the heat, unwrap it and pat it dry.

While the pork is cooking, start the dressing for the beans. In a small frying pan, heat 2 tbsp of olive oil and sear toss in the ginger, chilli and tomatoes, leaving them undisturbed for a few minutes so that they can caramelize well. When the veggies are beginning to soften, add the white wine vinegar and water, cooking for a minute or so to reduce the liquid a little.
Tip the hot vegetables into a blender and blitz into a fine puree, then add the salt and pepper and the lemon juice. With the blender running, drizzle the 100ml of olive oil in in a thin stream to combine into a loose, cohesive dressing, much like a vinaigrette.

Tip the dressing back into the pan you cooked the veggies in and add the pre-cooked beans, warming slowly on a low heat while you sear the pork.

In a skillet, warm 1 tbsp of olive oil over a med-high heat until shimmery-hot. Carefully place the pork in the hot oil and don't touch it for about 30 seconds, allowing it to go a little golden on the bottom before giving it a third-turn, brown and turn one more time. You don't want to leave the pork in the pan for longer than you have to because you'll undo the past 45 minutes' work. Deglaze the pan with the remaining juice of half a lemon and a little water.

To serve, arrange the rocket and spinach leaves on a plate and spoon the warm beans on top. Slice the pork into approx 1cm (1/2") thick slices and lay on top of the beans then drizzle with the pan juices.

Look at the difference between the pork tenderloin cooked this way and the conventionally cooked one in the link below:
Marinated Pork Tenderloin on FoodistaMarinated Pork Tenderloin

Saturday, 17 April 2010

Sous Vide For Peasants

Ever since I first read Heston Blumenthal's incredible book The Big Fat Duck Cookbook, I have been fascinated by the idea of sous vide cookery. Literally translated from the French for Under Vacuum, this technique requires cooking food (usually meat or fish) for a long time in vacuum-sealed plastic bags, in a bath of water kept at a constant, precisely-controlled, low temperatures.
The science behind this method of cooking is basically that when cooked at high temperatures, meat and fish fibres contract, squeezing out valuable moisture. By the time the centre of the meat is cooked through, the outside is overdone. By using a low, but safe temperature for a long time, you can create a piece of meat which is incredibly moist and tender, creating textures which are not obtainable by any other method.I am by no means anywhere near an authority on the subject, just a conscientious amateur, so I wont pretend to give advice or claim to know how it's supposed to be done properly. I do have Thomas Keller's book Under Pressure on my Amazon wish list, which will be my next purchase, but for now, I relied on random other posts online and some advice from my cheffy friend Dave.

This is how it went down for me. I learned quite a bit, including that I could have cooked at a lower temp for less time, but the results were still astonishingly good and far better than using traditional methods. I'm itching to try something else next week, probably a pork tenderloin or lovely piece of steak. This time I used chicken breasts, which are notorious for going dry and fibrous when overcooked. Even my harshest culinary critic, Drew was surprised by what a difference this method acheived.

Again, I am NOT an expert, so if you copy this and end up on the loo or in the hospital for a few days, don't blame me. This post looks like one that might be a good one to try and is what looks like a fairly close copy of David Chang's Ghetto Sous Vide hangar steak.

As I'm writing this, I'm watching the Hairy Bikers and they're interviewing the chef/owner of a pub in Oxfordhire. She used to work with Heston at the Fat Duck and is using the sous vide water bath to confit partridge in goose fat.

It's not fair that I'm not allowed to spend roughly £900 on equipment. My husband is completely unreasonable.

So here is basically how it went:

I brined my chicken breasts, minus the tenderloins and skin in a solution of 7% salt water with sugar, chilli flakes, peppercorns, bay, garlic and onion for about six hours. I would have done it overnight if I'd thought about it, but as it was, the few hours was fine.

I took the chicken and brine out of the fridge about an hour and a half before I planned to cook it, so that I wouldn't lower the temperature of the water too much when I added the meat.


I filled my largest stock pot with hot tap water and brought it to 68C (155F) with a low flame.
Unless you have sous vide equipment, a probe thermometer is essential, as you need to keep an eye on the temperature.

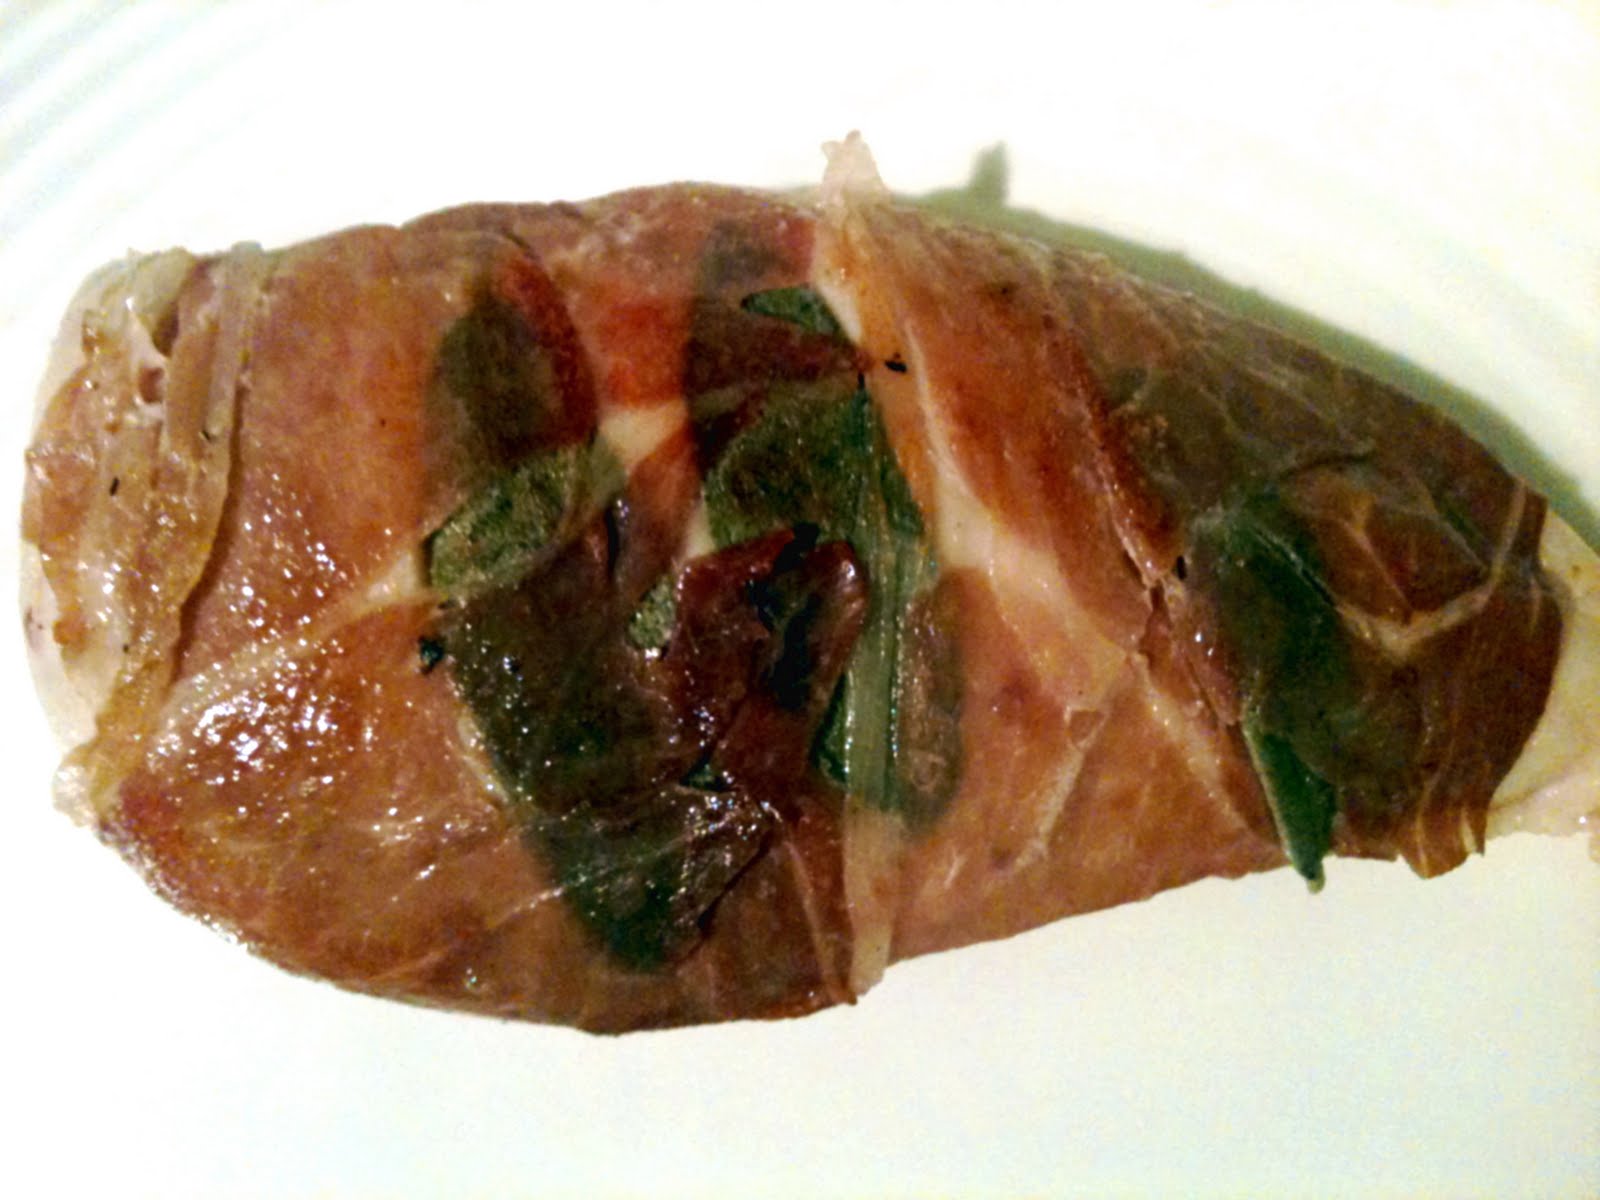
I popped a couple of sage leaves on the outside of the chicken breast and then wrapped it tightly with thinly sliced prosciutto and carefully put them into sandwich-size, press-seal freezer bags. Before I put the chicken in the bags, I folded the bags about halfway inside-out, like a cuff, so that I could put the meat in without it touching the opening.
After the meat was safely in, I pushed as much as the air as possible out and sealed them, almost all the way, leaving an opening at one corner through which to suck the rest of the air out. Once I had as much air out as possible and while still sucking, I finished sealing the bags.

I lowered the bags of chicken to the pot and they sunk to the bottom because there was no air left.

The temperature dropped to 62C (145F) at which I now think I should have left it but I was being cautious because it was my first time.

I brought the heat back up to 155 and left the chicken to cook for an hour, checking the temperature regularly, stirring the pot to circulate the heat and adding cold water as necessary when the temperature started to creep up.

I was definitely playing it super safe, so the chicken spent close to an hour and a half in the hot water, including the time that it took for the pan to come back up to temperature. Next time I'm going to follow my chef friend's advice and shoot for 58C (136) for an hour instead.

So because there was no high, dry heat, what came out of the bags was, unsurprisingly, pale and soft and unappealing looking. To get the lovely golden brown I was after, I heated a cast iron skillet and gave the chicken about 20 seconds on each side.

I served the chicken with some simple garlic sauteed potatoes and a spring leaf (from our garden!) salad.

The chicken was slightly pink throughout, but that is pretty much all the case when brine is involved.

I had read that herbs can over power when cooked this way and this is true. The sage maintained an unpleasantly strong flavour but when pulled off to the side, it left a lovely flavour behind.


The chicken was so tender that a knife became unnecessary for all but the prosciutto and incredibly moist. There is no doubt that this technique works incredibly well and I will definitely give it a try again soon but with slightly less caution and a different meat.

At the Fat Duck, several of the dishes we ate were cooked sous vide, but the one that stands out to me the most was the salmon poached in liquorice. The salmon had the most incredible texture, almost like raw but ever so slightly flaky. Incredible.


Sous Vide on FoodistaSous Vide

Monday, 5 April 2010

Easter Feastin

I have a major food and wine hangover today. I was so full last night when I went to bed that I couldn't sleep until something like three am, groaning with a gut like Chris Farley's.
We had a lovely day with lots of wine, an abandoned attempt at a game of Rummikub, because my stepmother Judy and I had had more wine than you should drink before learning the rules of a game.
I made Dad his simnel cake yesterday and I finished Drew's Bailey's cheesecake first thing in the morning, which left the rest of the morning and afternoon to concentrate on the rest of the food.
Because I like to actually spend time with the people I'm going to dine with AND I don't like to worry too much about sensitive timing, I chose dishes which required little effort and a lot of time in the oven, so that lunch could cook unattended, filling the house with wonderful smells while we hung out and drank the aforementioned glasses of wine.
I took a lot of inspiration from Delicious and Olive magazines this year and put a bit of a Mediterranean twist on a fairly traditional menu. None of the ingredients cost more than a few quid, because we're still po'. Even the pork roast was only like £10, weighing over 2 kilos (about 4 1/2 lbs).
We had:
A roast belly of Gloucester Old Spot pork stuffed with cous cous, feta and herbs.


Butter beans braised in tomatoes, anchovies and oregano.
Freshly baked sourdough bread (success! :-D) and a leafy green salad.


Some crushed new potatoes, roasted with garlic, fennel and rosemary.
And grilled courgettes.We rounded off the meal with a slice of simnel cake and some Baileys Cheesecake, which my husband is so possessive of, he actually dictated how big a slice everybody could have. I've promised he can have the remaining 8 slices all to himself. I expect them to last until tomorrow.

Saturday, 27 March 2010

Back Breaking Work.


I was all excited this morning when I got up, eager to go out and do some serious vegetable gardening. I had a bunch of seeds and garlic cloves that need to go into the ground and Jerusalem artichokes and a few varieties of potatoes to plant in potato bags.
So after breakfast, on went the wellies and the dogs and I ventured out to the veggie patch. The plan was this: Fill the grow bags with soil and compost (and tubers!) and then start on pretty little rows of radishes, beets, carrots, peas, beans.....and on and on. I was planning to save the greenhouse projects like tomatoes and chillies for the afternoon, when it was supposed to rain.

As it turns out, I should probably done some stretches before flinging shovels-full of dirt, because half way through carrying the filled grow bags my back went out. It felt rather like a massive rubber band running across my back had snapped and raveled back on itself. It was frightening!

I can only imagine what the neighbours thought if they heard the noises I was making. Perhaps that I had Tiger Woods or John Terry over?

I waddled, doubled over back to the house, feeling embarrassed about my shocking physical condition and worrying that I'd slipped a disc or something.

By the time it was time to make dinner, I'd taken a super-hot bath, some arnica and some (lots) codeine and was feeling considerably better, although in no way up to an hour or more of vigourous cookery. I had made a ball of pasta dough yesterday, as I was planning to make these simple tortellini. As with things like samosas, pasties and some other stuffed pastry dishes, there's a little time taken stuffing/folding etc, but it's a rather zen activity and rather relaxing as long as you're not in a hurry.

This was my first attempt at making pasta, which is weird because I like to make as much as possible from scratch but we usually eat noodles like spaghetti or tagliatelle rather than stuffed pastas like this. I don't yet have a pasta machine, but it's on my Amazon wish list (Are you reading Daddy?) so hopefully I'll have one by my next birthday.

I used Raymond Blanc's pasta dough recipe, which worked well I thought. I think I could have rolled the dough out a little thinner so I will next time but otherwise it was a really lovely dish.

Pork and Arugula Tortellini with a Simple Tomato Sauce
serves 2, takes approx 1 hour- 75 mins

200g (7 oz) tipo 00 flour
2 large free range eggs

100g (3.5 oz) minced pork
100g (3.5 oz) pancetta, chopped quite small.
2 cloves garlic, minced
1/2 tsp fennel seeds
large handful rocket (arugula) roughly chopped
2 tbsp freshly grated parmesan
salt and pepper

3 large, ripe tomatoes
1 more clove garlic, crushed
2 sprigs basil, leaves picked and cut into chiffonade
2 tbsp olive oil
sea salt
pinch crushed red chilli

In a food processor, tip the flour and the eggs and pulse for a minute to bring the two together into a dough. Add a few drops of water if the mixture is too dry- you want it to come together in a ball without being sticky. When well mixed, put your ball on a piece of cling film, flatten into a disc about half an inch thick, then wrap and refrigerate for half an hour.

While your pasta is chilling, make your filling. In the food processor, add the pork, pancetta, garlic, fennel seeds, parmesan, rocket and a little salt and fresh black pepper. Pulse a few times to bring the mixture together well but be careful not to turn it into a paste, as you want to retain the texture of the meat.

When the dough has rested, roll it out on a well floured worktop to a thickness of about 2mm (1/8") then use a 7cm (2.5-3") circular cutter to cut out round pieces and dust off any excess flour. Put about a teaspoonful of the meat mixture in the centre of the pasta rounds and wet one half of the circle, then fold the edges together into a semi circle, being sure to push any air out as you go. If you have air trapped inside, it could expand and burst the pasta shells when you cook them, making a nasty mess. Now, bring the two corners together, overlapping the two points, sticking together with a little water to make little closed crescent shapes.

Put a large pot of water on to boil with some salt.
Add your pasta to the boiling water and cook for about 10-12 minutes while you make your sauce.

Blanch the tomatoes first, by cutting a shallow X in the skin and plunging into boiling water for fifteen seconds. The skins should peel off quite easily now.
Halve the tomatoes and scrape out all the seeds and pulp, reserving them in a small bowl. Dice the tomatoes.

Heat the olive oil in a sautee pan over a low-med heat and gently fry the garlic without letting it brown. Add the tomatoes to the pan with a few good pinches of olive oil and run the reserved tomato seeds and pulp through a sieve into the pan. That soft jellyish bit inside the tomato is rich in umami, and so is important to the sauce. Add your pinch of chilli and allow the sauce to cook for a couple of minutes until the tomatoes have broken down and have lost their raw smell. Stir through the basil and remove from the heat.

Your pasta should be cooked at about the same time as your sauce, so drain it well and add to the sauce. Toss well to coat and serve with plenty of fresh parmesan.

Tortellini on FoodistaTortellini

Friday, 19 March 2010

A Little Italian On A Drizzly Evening.

Pork chops are one of my husband's and my favourite pieces of meat, so I tend to put them on the menu every few weeks. Tonight I served them with a wet polenta, cooked with chicken stock and Parmesan. For a veg, I made steamed tenderstem broccoli with some crunchy, lemony breadcrumbs. T-bone chops are one of the 'forgotten cuts' which tend to be less expensive than say, a loin chop but they're at least as tasty and stay really moist and tender during cooking.

The free range pork available here is so fantastic that I tend not to do much beyond basic seasoning before I cook them but they are also lovely with a couple of fresh sage leaves pressed into each side.

T-bone Pork Chops With Crackling And Wet Polenta
serves 4, takes 40 mins

4 free range T-bone pork chops about 2cm (3/4")thick
1 tbsp olive oil
sea salt and freshly milled black pepper

200g (7oz) yellow polenta
1 litre (2.1 pints) free range chicken stock
a small handful freshly grated parmesan
1 tsp sea salt
How simple are those ingredients?!:-)

Whack your oven up to 200C (400F)
If you look at the chop laying flat on your cutting board, you can see that between the skin (rind) and the meat itself, there's a layer of fat attached to each. Using a sharp knife, separate the skin from the chop in between these two layers. Score the skin about 2mm (1/8") down and put these pieces of skin fat side down in a small baking sheet. Sprinkle liberally with the sea salt and pop them into the oven.
Bring the chicken stock to a simmer in a heavy-based, medium-sized saucepan, then sprinkle the polenta in to the pot in a steady stream, all the while stirring briskly with a balloon whisk.
Continue to stir for a minute, until the mixture is quite thick and smooth then turn the heat to low and allow to cook (splut. splut.) for another 15-20 minutes. Taste test this mixture to make sure that the seasoning is spot-on, adding a little sea salt if necessary. Make sure that the polenta is completely soft, then stir in the grated parm and remove from the heat.

While the polenta is simmering, sprinkle the chops with a little sea salt and black pepper and brush with a little olive oil. Bring a large oven proof frying pan or skillet to a nice high heat and carefully place the chops onto the hot surface. Leave alone for 3-4 minutes, until nicely browned on the bottom, then turn over and pop in the oven for a further 7 minutes. Remove the chops from the oven and allow them to rest for 10 minutes before serving on a mound of the soft polenta and squeeze a few drops of lemon juice over the top.

Your skin pieces should be nice and blistered and brittle-crunchy by now, but if it's not, just pop it under a hot grill for a minute to crisp them up, then serve them on top of the chops.

If you'd like to try the lemony breadcrumbs I topped the broccoli with, here you go:
Melt a couple of tbsp of butter in a small frying pan until foaming, then finely grate half a teaspoonful of lemon zest into the butter and let that mixture reduce so that the liquid from the juice has cooked out. Sprinkle a little sea salt over the butter and then toss in a couple handfuls of dried coarse bread crumbs. Fry for a minute until all the butter has been absorbed by the crumbs and they've gone a lovely golden brown. Sprinkle away!


Italian Pork Chops on FoodistaItalian Pork Chops


Polenta


Tuesday, 16 March 2010

Patience Rewarded With Porky Perfection

I used to think I didn't like Mexican food. I spent far too much of my life eating in bad restaurants, believing that taco salads, 'fiesta rice' and sloppy grey tinned refried beans were Mexican food. And then I moved to Arizona.
Granted, AZ has its share of gringo-owned chains, decorated with dusty serapes and sombreros but luckily there are just as many independently owned little gems serving up exciting, vibrant regional dishes.

Because of the large Mexican population in Arizona and being married to the son of a Mexican, I came to LOVE their food and set about trying to perfect a few recipes.
My husband showed me how to make beans like his Grandma's and my friend David Schuttenberg, head Chef at El Cabrito in Manhattan, NY has been a brilliant source of recipes and inspiration. Here in the UK, we have born-again senorita Thomasina Miers educating British palates about the real deal in her Wahaca restaurants and on TV shows like Market Kitchen and The Wild Gourmets.

I have got a bit better understanding now of the ingredients and methods used in proper Mexican cookery and while I still have a TON to learn, I thought I'd give roasted pork shoulder a go. I had planned to make carnitas, but when the time came I just didn't fancy it, so I thought I'd slow roast my pork instead. Had I planned ahead, I would probably have brined the meat overnight first, but the result as it was was lovely.

The cooking time is long, but the amount of time spent doing actual work is minimal.

Chipotle-Rubbed, Roasted Pork Shoulder Tacos.
serves 4, takes 4 1/2 hours

1 kg (2/2lbs) free range pork shoulder (Skin ON if you can get it!)
1 tbsp sea salt
1 tbsp ground chipotle chilli powder (Or hot, smoked paprika)
Boiling water
juice and zest of 1 lime
3 gloves garlic, halved.
tbsp coriander seeds
1 Medium onion, sliced
stems from a bunch of coriander
500ml (1 pint) homemade or good quality free-range chicken stock
250g dried pinto beans OR 2 cans cooked, ready to eat pinto beans

To serve-
handful celery leaves
handful coriander (cilantro) leaves
a few large handfuls shredded white cabbage
thinly sliced onions
sliced radishes
sliced green chilli
sliced ripe avocado
fresh lime juice
hot sauce (for me it's Frank's Red Hot)
Flour or corn tortillas

Crank your oven up as high as it will go and pop your kettle on to boil. In a roasting tin big enough to hold the pork, but not much much bigger, put the garlic, coriander seeds, lime zest, sliced onions, coriander stems, chicken stock and lime juice. If your butcher has not already scored the skin, use a very sharp knife to score through the top layer, into the fat but NOT into the meat. Place the pork on a wire rack in the sink and pour the kettleful of boiling water over the skin, which will make it shrink and the cuts open up. Rub the sea salt and chipotle (or as my husband calls it, 'chipplepoltlay' :-) all over the skin and rub well into the cuts and around the rest of the meat. Place the meat, skin-side-up in the roasting dish on top of the aromatics and pop in the oven.
leave the pork in the oven for 15 minutes, then turn the heat down to 150 degrees C (300F), remove the dish long enough to cover tightly with foil, then cook for 4 hours, removing the foil and cooking uncovered for the final 2 hours.

If you're using dried beans, start yesterday by soaking them over night in cold water, then simmer for 2.5 hours in unsalted water until tender. Season with salt once they're cooked.

If you're using canned beans, just warm them up in the can liquid over a low heat.

Remove your gorgeous, mahogany coloured piece of pork from the oven and set skin-side-down on a chopping board. Use a sharp knife to cut through the meat and skin, making large, rough chunks. (If the skin is too hard to cut through, separate it from the meat and cut through it separately, using the scores you made as a guide) The meat will be so tender, you'll be more pulling/squashing it apart than cutting it. Yum, right?

Serve heaps of this incredible, tender meat and crunchy skin in your tortillas with the crisp shredded cabbage, onions, radishes, avocados, herbs and chilli. Squeeze copious amounts of lime juice, sprinkle a little sea salt and some hot sauce over your tasty handfuls and try not to made obscene noises while you eat them. You can eat the beans either on the side or tucked in with the rest of the tasty goodness, which how I prefer them.

Pork Tacos

Saturday, 20 February 2010

Chinese Braised Pork Belly AKA Red Cooked Pork

One of the things I learned in China (besides it's ok for kids to defecate in public and their candy is WEIRD) is that the Chinese know how to treat pork. Not pigs, Lordy no, the animal welfare we witnessed was horrifying. Like a dirty game of 'how many clowns can you fit in a Mini' except with livestock and cages. Ugh, but let's not dwell on that.
I have mentioned before that I love to make crispy pork belly all Chinese-y style and I do. I think that there are few things more amazing than crispy crunchy skin scented with five spice BUT. This Hunanese treatment of my favourite part of pig is anything but crisp, but rather tender, melting, unctuous and so comforting. Incredibly easy to make, with just a few store cupboard ingredients and a little time it's a brilliant Sunday dinner dish. If you double the recipe, it'd be brilliant for a dinner party because it's cheap, there's no touchy timing and you can relax and chat (drink) with your guests instead of barging around all sweaty and frantic, waving oven gloves and tongs in the air.
Red Braised Pork Belly with Pak Choi In Chilli Bean Sauce
Serves 4, takes 90 mins


1 1Kg (2.2lbs) slab belly pork, skin on
4 tbsp light soy sauce
2 tbsp dark soy sauce
5 Shaoxing rice wine
5 tbsp golden caster sugar
4 whole star anise
2 pieces cinnamon bark
2" piece ginger root, thinly sliced
3 whole garlic cloves, halved
4 large dried chillies

For the Pak Choi
6 heads pak choi (AKA bok choi) washed and halved or quartered, depending on the size.
2 tbsp chilli bean paste
2 cloves garlic, minced
1" ginger root, grated
2 tbsp ground nut or veg oil
2 spring onions, sliced, to garnish

Bring a large saucepan of water to a boil and cook the pork belly whole for 5 minutes. Remove from the water (don't throw out the water) and set aside to cool for a minute. Meanwhile, in a wok, mix all the other ingredients. Using a sharp knife, cut the pork into large chunks, but don't cut horizontally. Add the pork to the wok, and then enough of the hot, piggy water to cover the pork, then bring the whole lot to a boil. Once boiling, lower the heat to a simmer and have a glass of wine and play Doodle Jump on your iPhone for half an hour.
Your pork is going to cook for about an hour or so before you have to do anything else, just keep an eye on it to make sure the liquid doesn't cook too low.
After an hour, start cooking you rice (if you need it, my method is below) and do your prep for the pak (bok?) choi.
After about an hour and fifteen minutes, if the liquid in the wok is still high and thin, raise the heat to a good bubble until thick and sticky. Put into a warm bowl, cover with a pan lid to keep warm for a minute while you do the pak choi.
Over a high heat, bring the oil to a sizzle in the wok (Don't worry about washing it first) and toss in the ginger and garlic. Stir-fry for 20-30 seconds before adding the chilli bean paste. Add half a cup of water and let this bubble for a minute before adding the pak choi. Cook the pak choi in the sauce for 4-5 minutes, turning periodically to ensure even cooking and distribute the flavours.

Serve the amazingly tender, sticky, mahogany-coloured pork on top of the rice with the pak choi on the side.
Bathe in the glory.
Red Cooked Pork on FoodistaRed Cooked Pork

Friday, 5 February 2010

Roast Belly Of Pork With Root Veg

Whenever I try to imagine life as a vegetarian, almost always, the first thing that pops into my head is "What? No roast pork with crackling?!" Bacon, lamb chops, and roast chicken are almost as perfect, but I almost believe that something other-worldly is involved in the creation of perfectly crisp, salty skin teamed up with falling-apart-tender meat beneath. I will often do the pork belly as a part of a Chinese meal, but my favorite is still a simple, spice-rubbed joint served with roasted root veg. If you're in the States, or anywhere else where pork with the skin on is scarce, Go to the meat counter at a Mexican or Asian market, they know that the skin is the best part. Anyone with an iPhone knows how awful the camera is, so I apologize for the picture...

.

Crispy Belly of Pork Roasted with Root Veg

1Kg (2 lbs) pork belly, skin on and ribs attached.
1 tbsp plus 1 tsp sea salt
1 tsp caraway seeds
1 tsp fennel seeds
1 tsp freshly ground black pepper
500g fresh small beets
500g large carrots
2 medium yellow onions
5-6 cloves of garlic, unpeeled
bunch spring onions
1tbsp olive oil

Heat you oven as high as you can, and while it warms up, lay the pork belly skin-side-up in a large roasting tin. Pat as dry as you can with paper towels and use a VERY sharp knife to score the skin from side to side about 5mm (1/4") apart. You want to cut far enough down that you're going through the skin, but not the fat or into the meat. This will help the fat run off and promote super crispy skin.
Use you hands to stretch the skin so that the cuts open up a bit. Sprinkle over the 1 tbsp salt, caraway and fennel seeds and rub into the skin, making sure to get as much as you can into the little slits.
Put into the super-hot oven for 25 minutes before reducing the heat to 170C/340F to cook for two hours.
Meanwhile, prep the veggies. Peel and halve the baby beetroots and peel and cut the carrots into chunks about the same size as the beets. Peel and quarter the onions and give the garlic cloves a whack with the side of your knife. Toss this lot in the olive oil and remaining teaspoon of salt and tip into the area around the pork roast before it settles down for its 2-hour low/slow roast.
You'll want to turn the veg every half hour or so to prevent the natural sugars burning and ensure even roasting.
Fifteen minutes before everything is done, toss in the spring onions so that they cook, but don't lose their colour or texture. Test the root veggies' doneness by inserting the tip of a sharp knife into the centre. Give them a few minutes longer if you need to, it takes a LOT to overcook pork belly in this way. Tap the skin with the knife also, and if not yet hard and crunchy, pop it under a hot grill for a few minutes. Whatever you do though, don't leave the pork belly unattended under the grill, as it can burn very easily.

To serve, cut the belly in one piece from the ribs. Turn it skin-side-down and use a sharp knife to slice down through the meat and skin. This is far easier than trying to cut through the brittle skin first, as the meat below will be meltingly tender and will just get squashed.
I like it just with the accompanying veggies but mashed potatoes are also lovely with it.

This is not the lowest fat meal you can eat, but it's worth every calorie. Eat fruit and salad tomorrow.

Pork Belly on FoodistaPork Belly